![2617210b577d672136104a4f5660e04f07acf843-removebg-preview.png]](https://help.knowledgeanywhere.com/hs-fs/hubfs/2617210b577d672136104a4f5660e04f07acf843-removebg-preview.png?height=40&name=2617210b577d672136104a4f5660e04f07acf843-removebg-preview.png)
1. Adding an Image to a Page
To work in Course Studio, a user must have Developer or Editor administration rights and a Studio license assigned to them. For details, see the discussion of administrative rights in Course Studio - Workflow.
Before adding an image, you want to establish the layout of the page, meaning the arrangement of text and image elements on the page. This article explains how to work with images once you have created an image element (a placeholder for the image) as part of the page layout.
To add an image to a page:
- Establish your page layout. See Course Studio - Managing Page Layouts for guidance on establishing page layouts.
-
Click an image element and click Choose Image in the toolbar that appears.
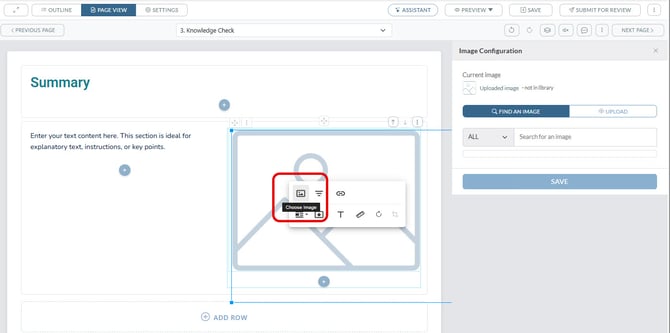
- The Image Configuration sidebar opens. You can upload an image or search the Resource Library or Studio’s stock image providers to find an image. See below for details.
Uploading an Image
To upload an image:-
Click Upload.
-
Browse to the image.
-
If you want to easily reuse the image, check Save to Resource Library. Files must be JPG, PNG, GIF, or SVG and are limited to 25 MB.
-
Click Save.
Using an Existing Image
You can also select an image you have uploaded to the Resource Library or select from the stock images available within Studio.To use a stock image or an image from the resource library:
- Click Find an Image.
- In the drop-down, select whether you want to search the Resource Library, stock images, or all images.
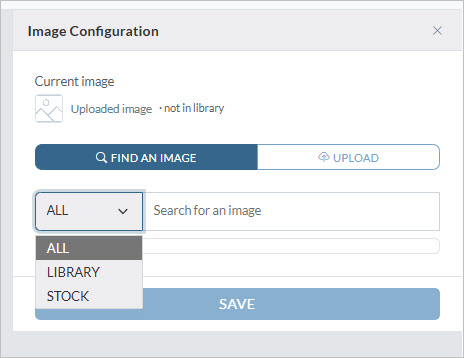
-
If you are selecting an image from the Resource Library, you can specify the language, as each Resource Library item has a language associated with it. Doing so limits search results to images associated with the specified language.
- Enter search terms. Stock images and images in the Resource Library are visually indexed to support search.
- Select the desired image and click Save.
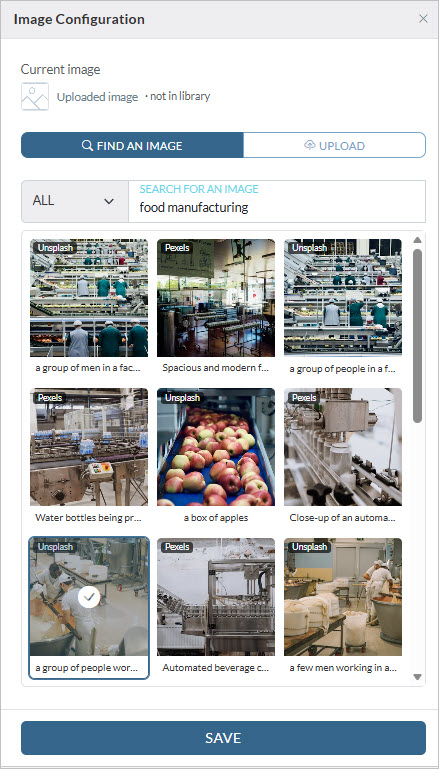
Stock images are from Unsplash and Pexels. Both are free to use commercially. However, stock photos carry a photographer credit, and it must stay. Unsplash and Pexels both require attribution as a condition of their licenses. The credit is captured automatically when you add the image and is displayed with it. Do not remove it — it is how your course meets the license terms.
✨If you have an Assistant AI for Studio license and are using Assistant AI's capabilities to help author the course, Assistant AI will suggest descriptions for images. By default, these descriptions will populate the search criteria.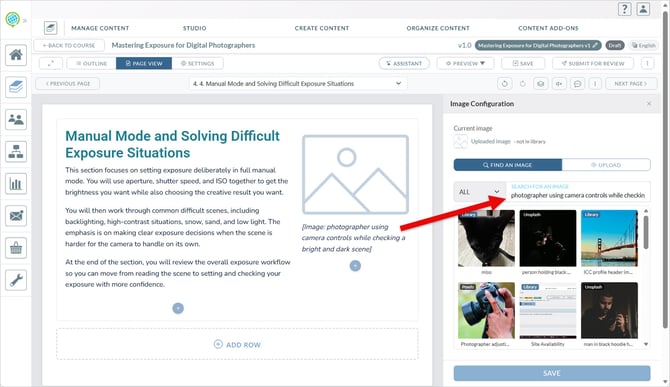
2. Manipulating Images
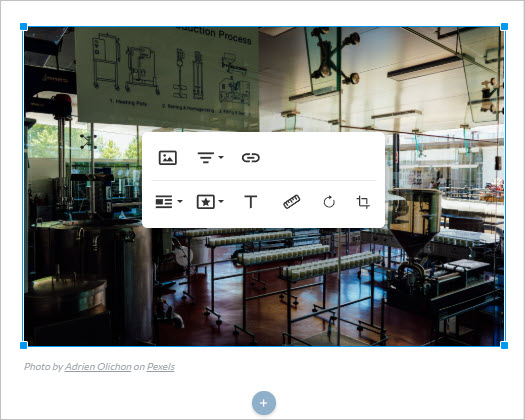
Clicking on an image invokes the pop-up toolbar. You can use this toolbar to:
- Replace the image by clicking on the Choose Image icon.
- Align the image left, right, or center within the image content element.
- Hyperlink the image.
- Add a border.
- Add alt text. Alt text (or alternative text) is a brief written description of an image that conveys its essential meaning and purpose, especially for screen‑reader users and when images fail to load.
- Change the size of the image.
- Crop the image.