![2617210b577d672136104a4f5660e04f07acf843-removebg-preview.png]](https://help.knowledgeanywhere.com/hs-fs/hubfs/2617210b577d672136104a4f5660e04f07acf843-removebg-preview.png?height=40&name=2617210b577d672136104a4f5660e04f07acf843-removebg-preview.png)
Table of Contents:
- Overview
- How Page Layouts Work
- Where to Find Page Layouts
- Creating a Page Layout in the Layout Library
- Creating a Page Layout from an Existing Page
- Applying a Page Layout to a Page
- Use Cases
- Things to Know
Administrative Rights
The table below shows the administrative rights for Page Layouts in Course Studio. You need to be an Editor to create and manage layouts. Anyone with rights to edit a course can apply a layout to a page, but only Editors can create, save, or delete them. For details, see the discussion of administrative rights in Course Studio - Workflow.
| Permission | Viewer | Author | Editor |
| View saved page layouts | ✅ | ✅ | ✅ |
| Apply a page layout to a page | ❌ | ✅ | ✅ |
| Create and edit page layouts | ❌ | ❌ | ✅ |
| Save and delete page layouts | ❌ | ❌ | ✅ |
| Delete page layouts | ❌ | ❌ | ✅ |
1. Overview
When you are building courses at scale, having to rebuild the same structure and apply the same visual settings to every course from scratch is time-consuming and easy to get inconsistent. Course Studio addresses this with several tools designed to give your content team a reliable starting point every time:
- Course templates are default course outlines that specify page structures (sections, and page names) for common course subjects. They are intended to be a starting point for a specific course and there are several default course templates currently available. Course templates cannot currently be edited or changed.
- Page layouts are standardized layouts that can be assigned to individual pages and reused across courses. A layout encompasses the arrangement of the items on the page (text boxes, images) and can include boilerplate content. Layouts do not specify course styling.
- Course styling allows you to change the visual appearance of an entire course -- the colors, fonts, and branding applied to a course when Learners view it. Styles can be shared across multiple courses and set as defaults at the site level. Studio comes with several default styles and you can create your own styling to match your preferences or branding.
This article will cover page layouts.
2. How Page Layouts Work
Page Layouts live in a central library within Course Studio and are managed separately from individual courses. Once created and saved, a layout becomes available to all course authors who have access to the platform. Authors can browse the layout library and apply any saved layout to a page with a few clicks.
A layout defines the structure of a page by specifying:
- Content blocks: The types of content areas on the page (text blocks and image placeholders)
- Arrangement: How those blocks are positioned — stacked vertically, side by side, or in a grid
- Proportions: The relative size of each block within the page (e.g., a two-thirds/one-third split between text and image)
- Content: Boilerplate text and images can be included in a layout.
What a layout does not include:
- Colors, fonts, or branding are controlled by Course Styling
- Page-level settings like page type or assessments
3. Where to Find Page Layouts
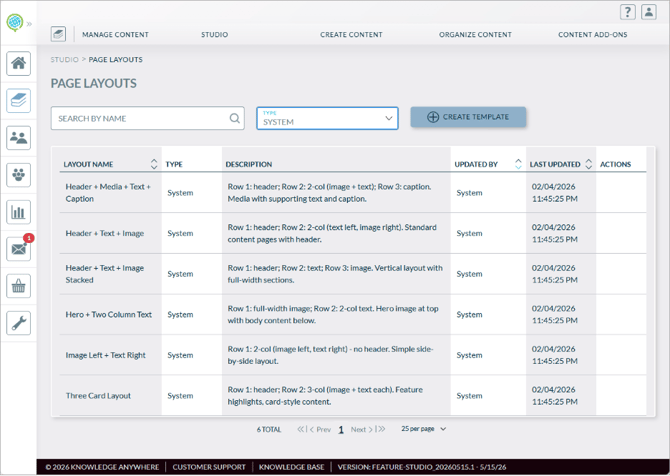
Page Layouts are managed from the Course Studio administration area. Editors can access the full layout library by selecting Studio > Page Layouts. From here, they can create new layouts, edit existing layouts, and delete layouts that are no longer needed.
4. Creating a Page Layout in the Layout Library
To create a new Page Layout, navigate to Studio > Page Layouts > Create Template. You will be taken into a layout editor where you can define the structure of the page.
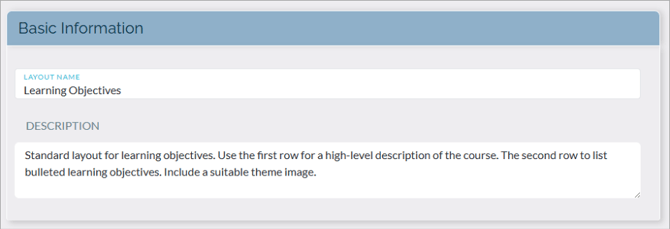
Step 1: Name Your Layout
Give the layout a clear, descriptive name that reflects its structure or intended use — for example, "Text Left, Image Right" or "Full-Width Image with Caption." This name is what authors will see when selecting a layout, so clarity here saves time for your whole team.
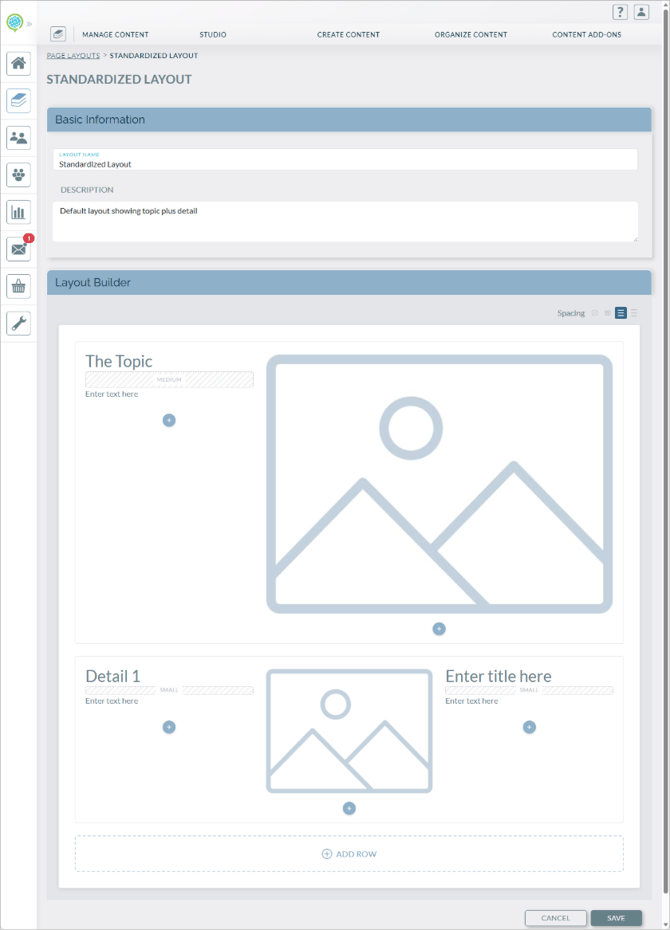
Step 2: Build the Structure
Use the layout editor to add and arrange content blocks on the page canvas. You can:
- Add content blocks such as hearings, text areas, image slots, or spacers.
- Move blocks to position them on the page.
- Change row spacing.
The layout editor uses a grid or column-based system to organize blocks. Each row on the page can contain one or more blocks side by side, and you can add as many rows as needed.
Once you are done, save the layout. Once the layout is saved, it is available for use by anyone with administrative rights to develop courses in Studio.
Deleting a layout makes it unavailable for future use. Existing pages using that layout are unaffected.
5. Creating a Page Layout from an Existing Page
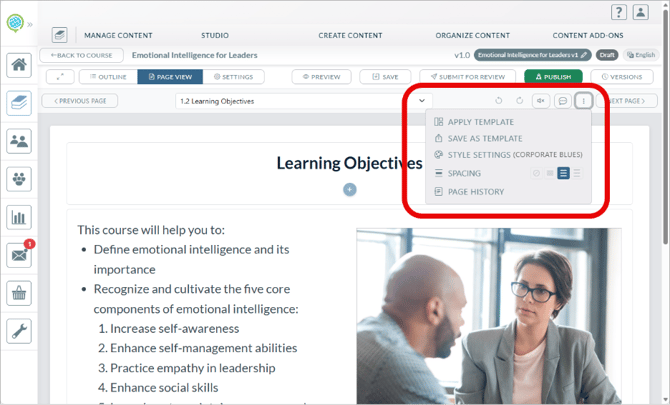
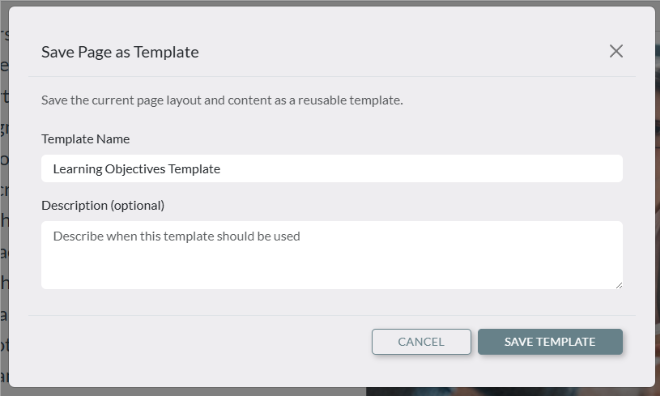
You can also create a Page Layout based on an existing page. Once you have created the page, click the three dots and select Save as Template. You will then be prompted to name the layout.
Creating a page layout in this manner saves the content as well as the layout of the page.
6. Applying a Page Layout to a Page
Course authors with edit access can apply a saved layout to any page within their course.
-
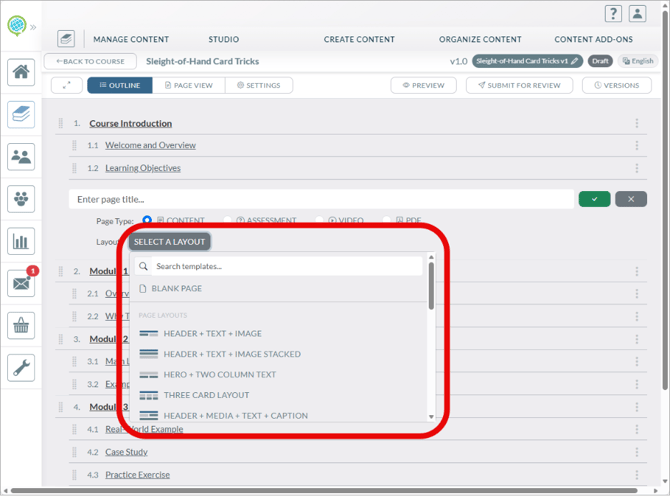
In Outline View, click Select Layout and choose the desired layout. A blank page will be created with that layout.
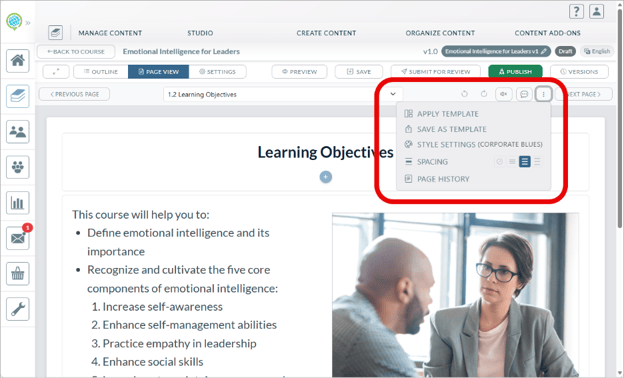
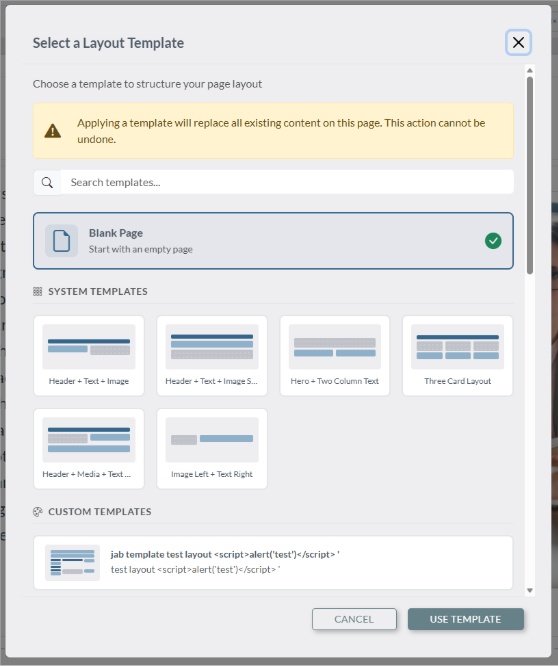
- When editing a page, click the three dots and select Apply Template. You will then be prompted to select a layout. Be aware that applying a template will replace all existing content on the page.
7. Use Cases
Page Layouts are most valuable when:
- Multiple authors are building courses: Layouts ensure all authors are starting from the same structural template, reducing inconsistency across courses.
- Your organization has a preferred content structure: If a certain page format works well for your learners, you can encode that structure into a layout for one-click reuse.
- Onboarding new course authors: New authors can produce on-brand, well-structured pages from day one without needing to know how to build page structures from scratch.
8. Things to Know
A few nuances to be aware of when working with Page Layouts:
- Layouts are structural, not visual: If you need to control colors, fonts, or branding, use Course Styling rather than Page Layouts. The two features work alongside each other — a page can have both a layout and a style applied.
- Deleting does not break existing pages: If you delete a layout that is already in use on pages across your courses, those pages will retain their structure. The layout will simply not be available for selection on new pages.
- Layouts are global, not course-specific: A layout created in the library is available across all courses on the platform. There is currently no way to restrict a layout to a specific course or group of courses.
- Page type is separate from layout: The type of a page (e.g., content, assessment, video) is set independently of the layout. A layout defines visual structure; page type determines the kind of interaction learners have with the page.
If you have questions about Course Studio, please reach out to your Knowledge Anywhere Account Manager, or email us at support@knowledgeanywhere.com.