![2617210b577d672136104a4f5660e04f07acf843-removebg-preview.png]](https://help.knowledgeanywhere.com/hs-fs/hubfs/2617210b577d672136104a4f5660e04f07acf843-removebg-preview.png?height=40&name=2617210b577d672136104a4f5660e04f07acf843-removebg-preview.png)
Table of Contents
Administrative Rights
To work with styling in Studio, a user must have Editor administration rights and Studio license assigned to them. For details, see Course Studio - Workflow.
1. Overview
When you are building courses, having to rebuild the same structure and manually apply the same visual settings to every course is time-consuming and risks inconsistency. Course Studio addresses this with several tools designed to give your content team a reliable starting point every time:
- Course templates are default course outlines that specify page structures (headings, subheadings, and page types) for common course subjects. They are intended to be a starting point for a specific course. Several default course templates are available. Course templates cannot currently be edited or changed. Course templates are discussed in Course Studio - Building Your First Course.
- Page layouts are standardized layouts that can be assigned to individual pages and reused across courses. A layout encompasses the arrangement of the items on the page (text boxes, images) and can include boilerplate content. Layouts do not specify course styling. Page layouts are discussed in Course Studio - Managing Page Layouts .
- Course styling allows you to change the visual appearance of an entire course -- the colors, fonts, and branding applied to a course when Learners view it. Stylings can be shared across multiple courses and set as defaults at the site and microsite level. Studio comes with several default stylings and you can create your own styling to match your preferences or branding.
This article covers course styling. Styling is a great way to implement consistent branding and free course developers from concerns about course appearance.
2. What a Styling Configuration Controls
Each styling configuration is a named set of visual settings. To see or edit a styling configuration:
-
Go to Studio > Course Styling.
- You will see a list of stylings. Roll over the styling you want to edit and click the edit icon.
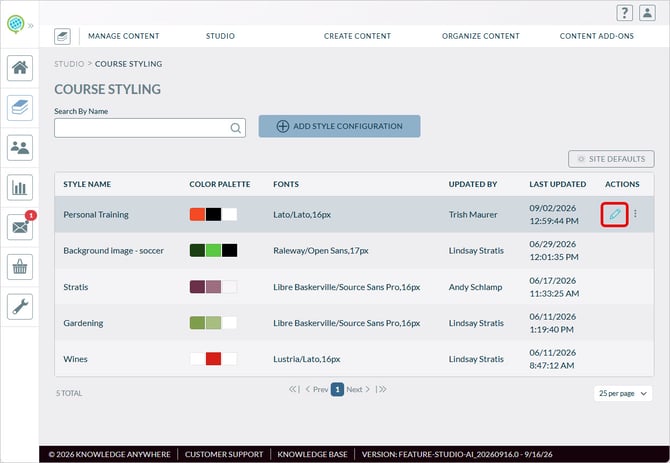
You cannot edit a published styling. To make changes to a published styling, click Create Draft to Edit at the bottom of the Course Styling page.
On the Edit Course Styling page you will see:
- Color settings:
- Background color - The main background of the course content area.
- Heading color - Applied to all heading text (H1 through H6) within course pages.
- Body text color - The default color for paragraph text, list items, and other body content.
- Highlight color - Used for accent elements, active navigation states, and selected items.
- Button color and button text color - Controls the appearance of call-to-action buttons within course pages.
- Navigation background and text color - Applied to the course header bar, the table of contents sidebar, and the course footer.
- Fonts and base font sizes - The typefaces used for headings and body text.
- Spacing - Whether spacing between rows, columns, and elements on the page is compact, normal, or spacious.
- Page background - A color, image, or gradient applied to the page background.
- Site availability - Which microsites have access to the styling.
- Version history - Allows you to revert to a previous version of the styling.
- Preview- Show how the styling will appear
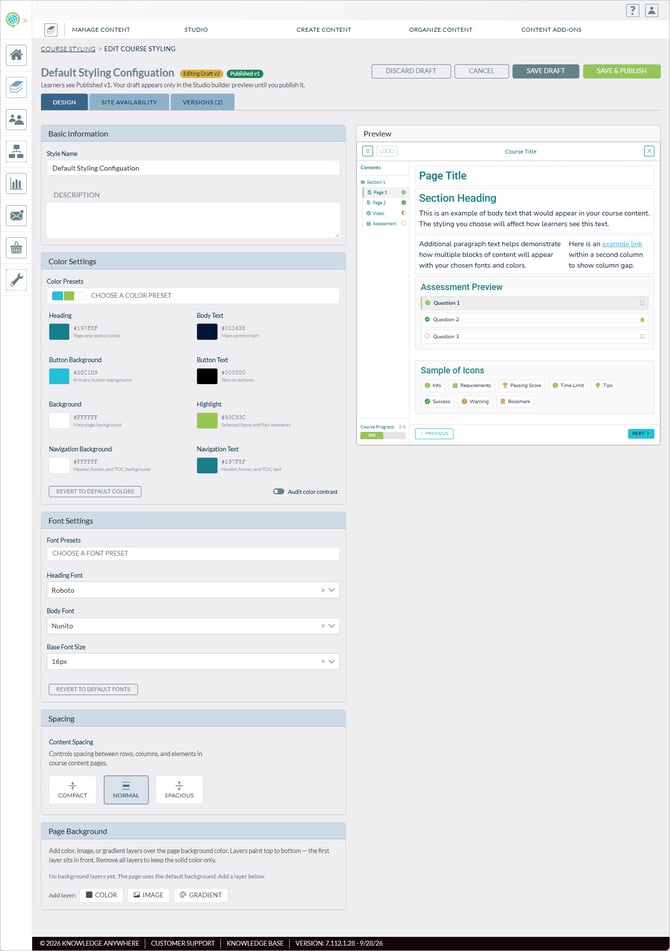
If no styling configuration is assigned to a course, the system uses a default set of colors and fonts built into Course Studio.
Note: When you publish an updated styling configuration, every course using that configuration or using it as the site default will immediately reflect the new styling for Learners. There is no separate publish step per course.
3. Creating a Styling Configuration
To create a new styling configuration:
Tip: If you want to base a styling on an existing styling, click the three dots in the Actions column, duplicate the styling, then edit the duplicated styling.
- Navigate to Course Studio > Course Styling.
- Click Add Style Configuration.
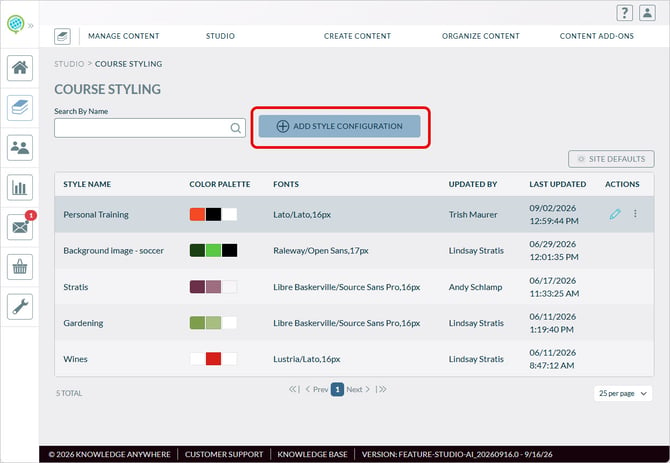
- Give the configuration a name and an optional description. Names should be meaningful (for example, "Compliance Training Brand" or "Partner Portal Default") so authors can easily identify the right styling when assigning it to a course.
- Specify the styling configuration (colors, fonts, page background, and spacing). Use the live preview to see the results of your selections.
- Under Color Settings, you can select a color preset that is similar to the design you want, the edit the different elements to fine tune the design.
- Under Page Background, you can build a background using color, image, and gradient layers. For complex backgrounds, experiment with layer order and opacity to get the effect you want.
- Remember to use the Preview to check your results.
- If you use microsites, you can specify which microsites have access to the styling. This can be useful to establish different branding for different microsites.
4. Saving and Publishing a Styling
Like course content, styling configurations have their own version lifecycle: Saved, Published, and Archived. A configuration must be published before it takes effect on any course. This means you can make and preview changes to a styling configuration without those changes going live until you are ready.
If you update a styling and publish a new version, any courses using that styling will be automatically updated to reflect the styling changes.
- Saved stylings are the working version of a configuration. They can be considered drafts and are visible to Editors but are not visible to Course Developers and cannot be applied to courses. To save a styling, simply click the Save button at the bottom of the Edit Course Styling page.
- Published stylings are the active version of a styling. Published stylings can be applied to courses by course developers and control the overall appearance of the course that Learners see. Only one version of a configuration can be published at a time. To publish a styling, click the three dots in the action column on the Course Styling page and click Publish.
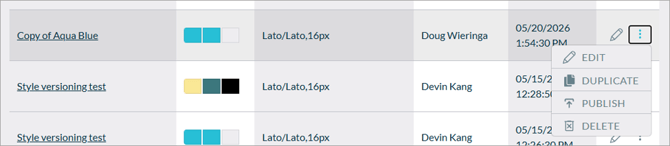
- Archived stylings are kept for historical reference. When an Editor publishes a new version, the previously published version is automatically archived.

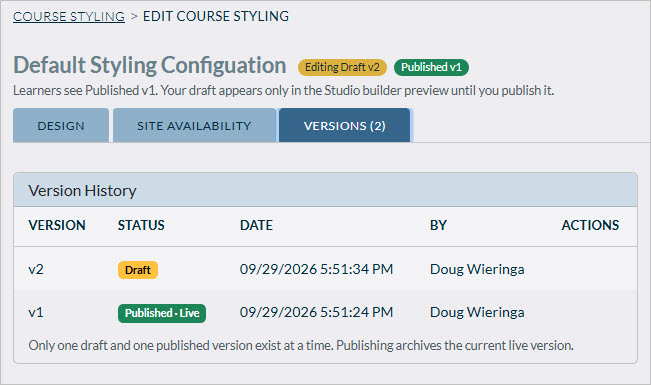
Version history is shown on the Versions tab. Here, Version 1 of the styling is active while Version 2 is being edited and does not yet affect the appearance of any courses.
5. Applying a Styling to a Course
Stylings are applied at the course version level. This means different published versions of the same course could theoretically use different styling configurations, though in most cases you will apply the same styling consistently.
When a styling configuration is updated, every course using it reflects the change automatically.
As a course developer, to apply a styling configuration to a course:
- Go to Studio > Course Versions.
- Open the course.
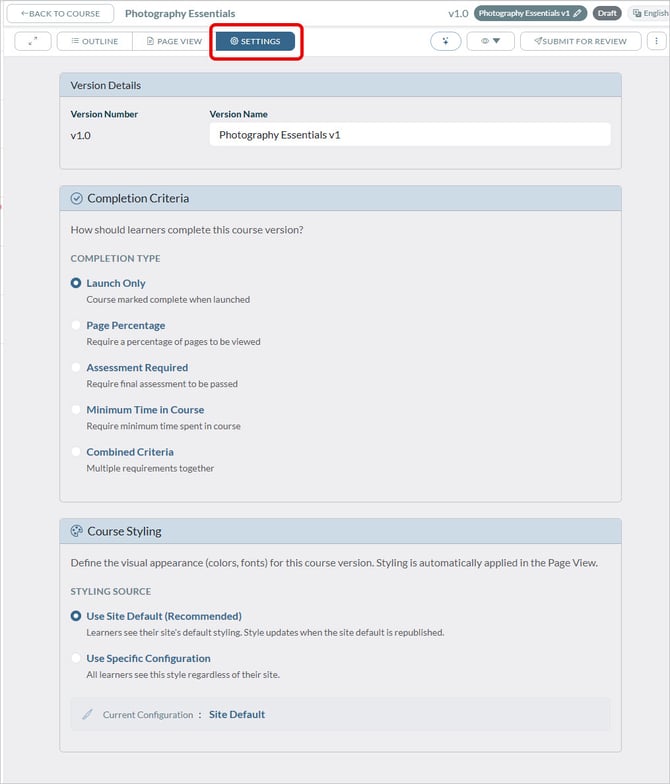
- Click Settings.
-
Under Course Styling, select the desired option:
-
- Use Site Default - The course will use whatever styling configuration has been set as the default for the site or microsite it belongs to. This is the default setting for all new courses. If no site default has been configured, Course Studio's built-in system styling is applied.
- Use Specific Configuration - Select a named styling configuration from the list. This overrides the site default for this course only.
The styling preview updates in the page editor as soon as a configuration is selected, so authors can see how their content will look with that styling applied before publishing.
6. Setting a Site Default
A site default is a styling configuration that applies automatically to all courses that have not been individually styled. Setting a site default is the most efficient way to ensure brand consistency across your catalog without having to manually assign a styling to every course.
To configure site defaults:
-
Go to Course Studio > Course Styling.
-
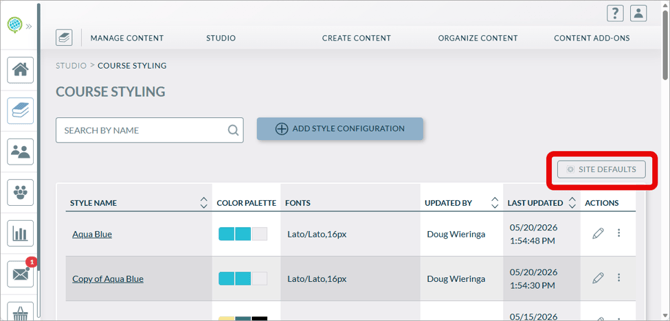
Click Site Defaults.
-
Under Default Configuration, you will see stylings available on the specified site (in this case the main site). Select the desired configuration. If your LMS uses multiple microsites, each microsite can have its own default styling configuration.
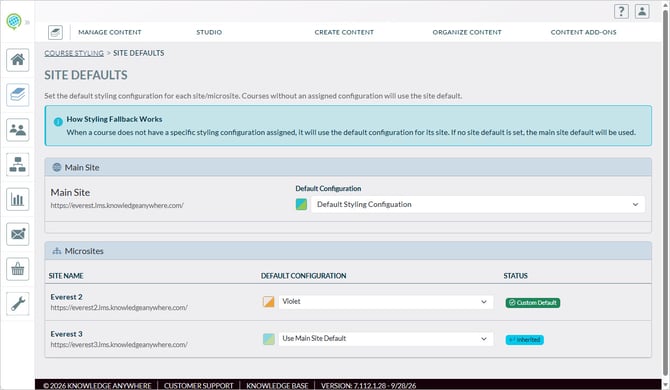
You can specify whether a styling is available on a microsite on the Site Availability tab under Edit Course Styling.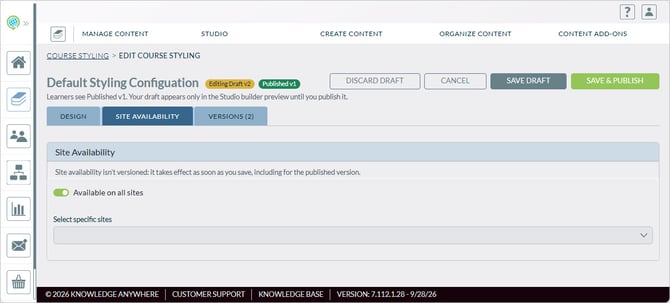
The system resolves which styling to apply to a course using the following priority order:
- A specific styling configuration assigned to the course version - this always takes priority.
- The default styling configuration for the Learner's microsite (the site they are accessing the course from).
- The default styling configuration for the main site.
- Course Studio's built-in system defaults - colors and fonts hardcoded into the platform.
Tip: If your organization has a single brand identity, set one styling configuration as the main site default and leave individual courses set to Use Site Default. This way, if your brand ever changes, you only need to update one configuration and every course updates automatically.
If you have questions about Course Studio, please reach out to your Knowledge Anywhere Account Manager, or email us at support@knowledgeanywhere.com.