SSO SAML integration is available to all Knowledge Anywhere pricing plans - Launch, Express, Professional, and Enterprise.
In this article, we will go through the steps needed to set up a SAML SSO on Knowledge Anywhere. Most of the configuration work will need to be done on your IdP server (ex: Azure, Okta, etc.), but there is some information that will need to be input into Knowledge Anywhere to complete the setup.
The following pieces of information are needed from your IdP service provider:
- IdP Entity ID
- IdP URL
- Certificate (x.509)
To start the configuration, please login to the Administrative side of your Knowledge Anywhere LMS and go to Site > SAML Settings > Add New
Here you will be able to configure SAML on Knowledge Anywhere with your Identity Provider.
Step 1 - Fill out IdP Name:
Please enter a name that you will remember (ex: Azure) and this name will be added to the SP Response (ACS) URL. Please note, the name must be alphanumeric and have no spaces. Once filled in, this will populate the SP Response (ACS) URL which will need to be input into your IdP service provider.
Important to note: You may want to click the ‘Configure IDP Fields Later’ to save and use the SP Response URL and SP Entity ID to generate your certificate in your IdP service provider.
Step 2 - Add IdP Entity ID and IDP URL:
IdP Entity ID - This will be the URL that will be the unique identifier for your application and is information that is provided by your IdP service provider.
IdP URL - This is where Knowledge Anywhere will redirect users for logging in.
Step 3 - Generate Certificate:
Download from your IdP provider and copy and paste the certificate information into the certificate field on the SAML configuration screen. You will see this as an x.509 certificate. Currently, Knowledge Anywhere does not accept XML certificates.
Step 4 - Domain:
If you are a Professional or Enterprise tier customer and have Extended Enterprise versions of your LMS, you will have the ability to configure SAML on specific domains. Launch and Express tier customers will only see Main Site.
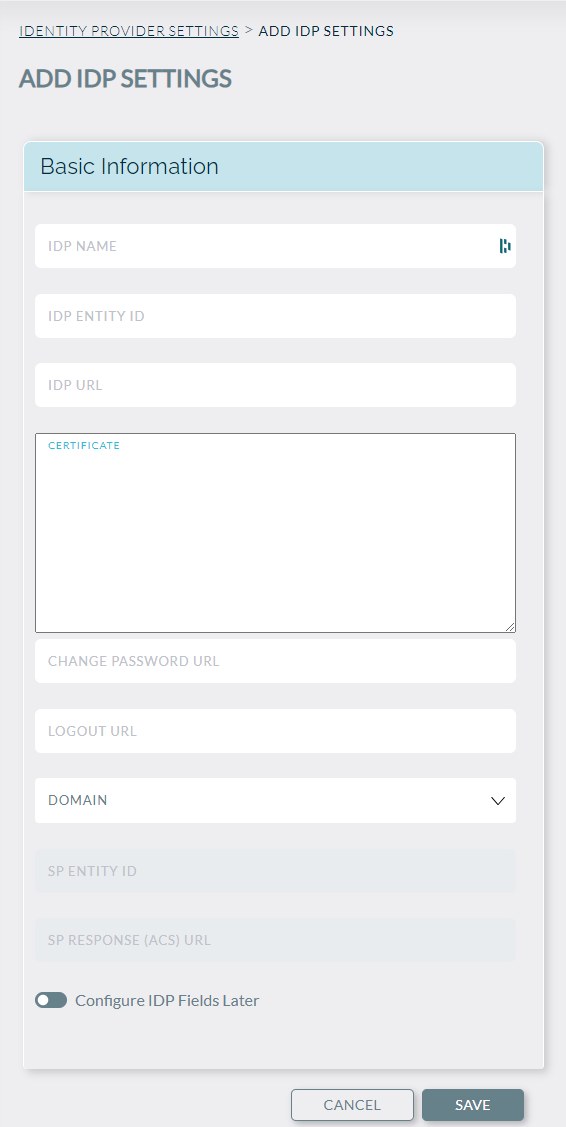
Step 5 - Optional Configurations:
Change Password URL - If you would like to direct users to a particular URL to change their password on your IdP service provider, please include the URL here.
Logout URL - If a URL is provided, this is where the user will be sent to for logging out.
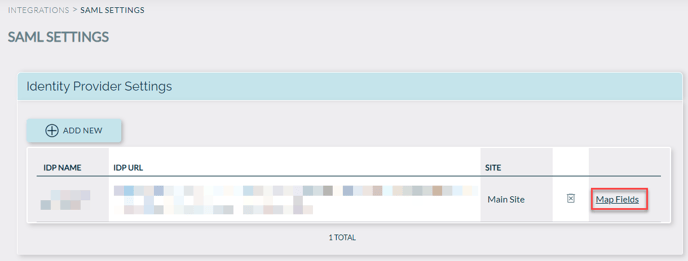
Step 6 - Field Mapping:
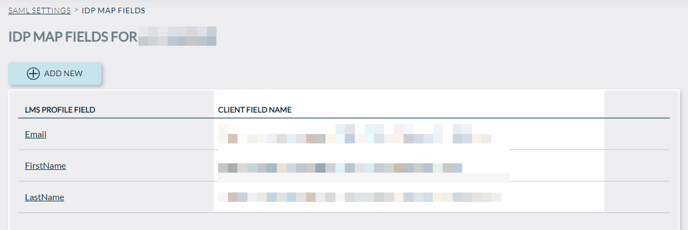
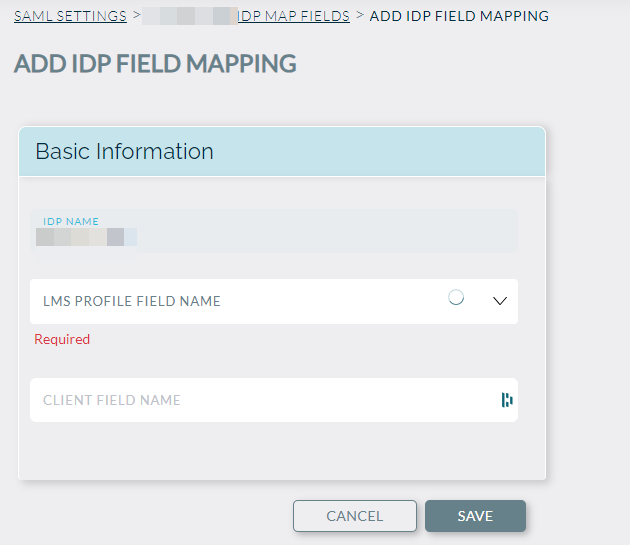
Last but not least, please map fields from IdP to Knowledge Anywhere. You can do this by clicking on the ‘Map Fields’ button. This will allow you to individually map fields. Client Field Name needs to be exactly the same as what is in your IdP service provider.
Fields that can be passed over SAML:
- FirstName
- LastName
- CompanyAddress1
- CompanyAddress2
- CompanyCity
- CompanyStateID
- CompanyZip
- CountryID
In addition to this, you can map your Custom Fields, which will depend on the settings within your Knowledge Anywhere LMS. You will see these fields pre-populated in the drop-down in Field Mapping.
User Mapping
Knowledge Anywhere will use the SSO ID to match again SSO user created accounts. User matching is only possible when the SSO ID provided by your IdP service provider is exactly the same as what is in Knowledge Anywhere’s database. If the SSO ID provided does not exist in Knowledge Anywhere, then a new user will be created.
If you would like to learn more about the design of our SAML 2.0 SSO, please see the design document attached below.
Common Identity Providers - Setup Guides
- Microsoft Azure Active Directory:
- Google GSuite: https://support.google.com/a/answer/6087519?hl=en
- Salesforce: https://developer.salesforce.com/page/Salesforce_IdP_Setup