Personalization Overview
- Open the Administrative Dashboard
- From the Settings tab, select Site Personalization in the top dropdown menu and select Personalization.
- If you have microsites, select the one you want to customize.
- On the page that appears, the Text&Images tab is selected by default. The first page in the dropdown will be the Login Page, which is the first section you'll see.
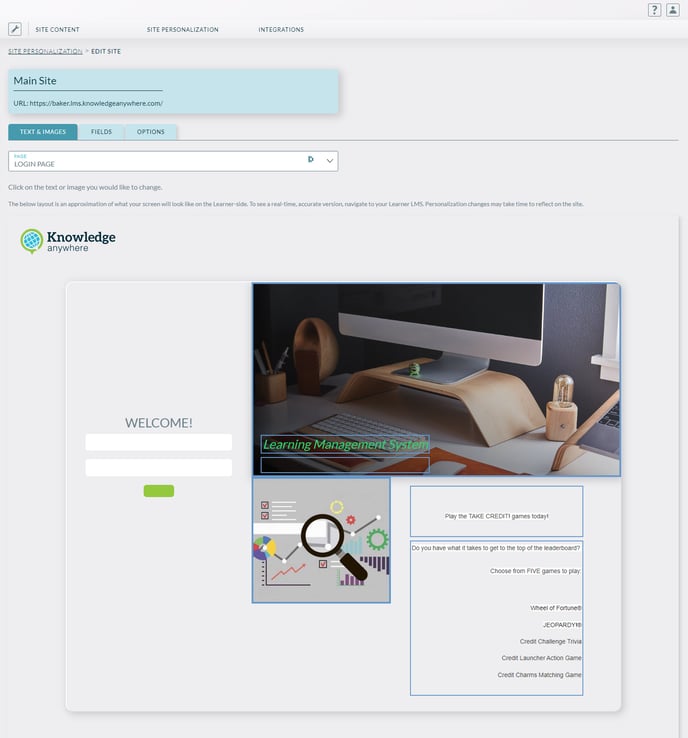
Using the blue borders, click the item you want to change. When hovering over an bordered section, it will appear red.
If you'd prefer a video tutorial of how to customize your LMS, you can watch that here.
To Customize Images
- By clicking on an image, that allows a new one to be uploaded, and the border will remain red. Select "Choose file" to upload an image.

- Once your image has been chosen, you are crop it to the appropriate size.

- Once cropped, you can either recrop, or, change darken/lighten the image if necessary via the two icons on the bottom.

- Once your image looks the way you want, click save. You can see how the image looks, and make further edits if necessary.

To Customize Text
- click on the text box you want to change, similar to how you selected an image to change.

- Make the appropriate changes to the text, and press save.

To Customize Videos
- On the Learner Home Page, there is an option to attach a video. Simply select the video, replace the link (ensure the embed is in the URL)

To Customize Learner Profile Options
- Open the Administrative Dashboard
- From the Settings tab, select Site Personalization in the top dropdown menu and select Personalization.
- If you have microsites, select the one you want to customize.
- On the page that appears, the Text&Images tab is selected by default; select the Fields tab.

- Configure fields as necessary.
Column Key:
- Required - This enables a field to be required on a learner's profile, that they must fill out in order to take a course. If a learner has not filled out this required field, they would not be able to take a course.
- Can Edit - A learner can directly edit the field on their profile. If a learner has not filled out this required field and they attempt to take a course, they will be routed to their profile to fill it out.
- Display - Enables for the field to be visible to a learner. If a field is hidden, it cannot be edited by a Learner.
To Customize Options
- Open the Administrative Dashboard
- From the Settings tab, select Site Personalization in the top dropdown menu and select Personalization.
- If you have microsites, select the one you want to customize.
- On the page that appears, the Text&Images tab is selected by default; select the Options
tab.

From here, certain options like a custom URL for the Company logo, social media links on the footer, and other items can be controlled here.