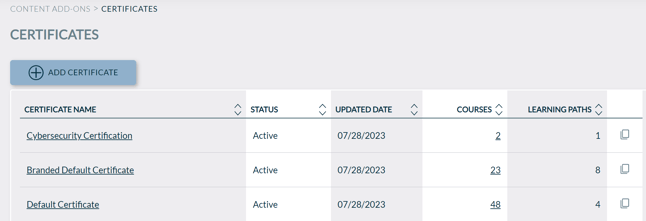
To view list of certificates
- Open the Administrative Dashboard
- From the Content tab, find Content Add-Ons menu, and select Certificates
- The list of certificates are shown. To see what courses can be taken to award a particular certificate, click on the number in the Courses column
To add a custom certificate
- From the certificates page (shown above), click ADD CERTIFICATE
- In the Add Certificate page
- Enter a Certificate Name
- Observe what the default template looks like:
- Each element inside the certificate template is listed on the left, under the Active/Inactive toggle
- The preview sample of the template is on the right
- Note the mapping from the left side to the right side (show in red arrows below)
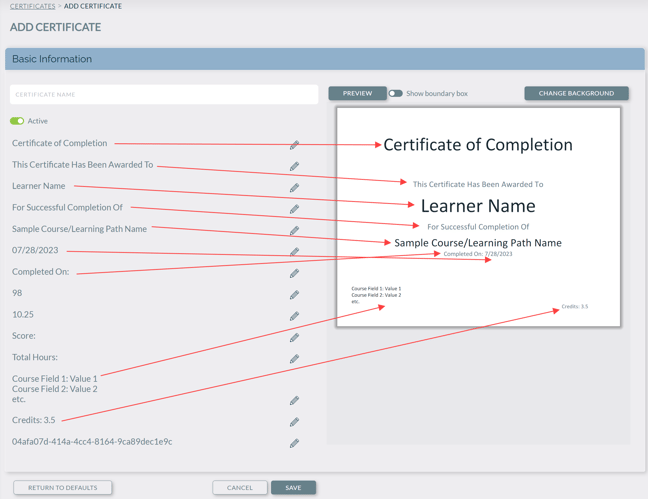
- The elements that don't show a value in the preview are marked as Inactive
- To show a currently-hidden element in the certificate, click on the pencil icon next to the element and set the toggle to Active, click click CLOSE to see the preview refresh
- To hide a currently-visible element from the certificate, click on the pencil icon next to the element and set the toggle to Inactive, click click CLOSE to see the preview refresh
- To update any element, it's suggested that you toggle on the Show boundary box,
then click the pencil icon next to the element you want to change. In the example below, click the pencil icon next to Learner Name and it will open up the editor for that element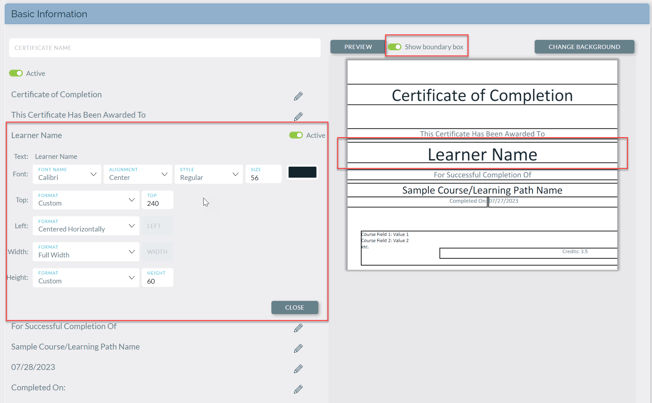
- You can specify the font weight/family/size/color by tweaking the fields in the "Font" row
- You can specify the location of the element relative to the entire certificate by tweaking the fields in the "Top" and "Left" rows
- The "Width" and "Height" rows have to do with position of the element in the boundary box
- To view temporary changes made to any of the fields, click CLOSE, and the Preview image will update. Alternatively, you can click PREVIEW button. If you wish to restore the template to how it was before coming into edit mode, click RETURN TO DEFAULTS at the bottom of the page
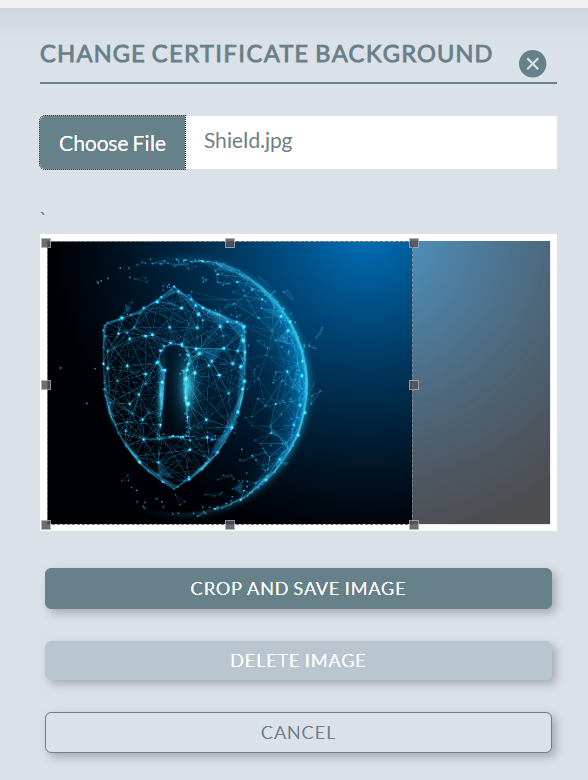
- To add or change the background image for the certificate, click CHANGE BACKGROUND
- upload an image, and optionally crop it, then click CROP AND SAVE IMAGE
- upload an image, and optionally crop it, then click CROP AND SAVE IMAGE
- To remove a background image, click CHANGE BACKGROUND, then DELETE IMAGE
- To save all temporary changes (as shown on PREVIEW), click SAVE at the bottom of the page
SPECIAL NOTE: The recommended image size is 994x768. Sizes vastly bigger or smaller may result in a blurry background image when the certificate is downloaded as a pdf.