
Learn how to easily create a new quiz to send to your team in Slack.
Users who have been granted authorship in their workspace are able to create quizzes that they can assign to members of their Slack workspace. If you’re the one who installed QuickQuiz, you’re already an author!
Quiz Title & Description
To start the quiz creation process, enter the command /quiz create in any channel. The following window should open up:
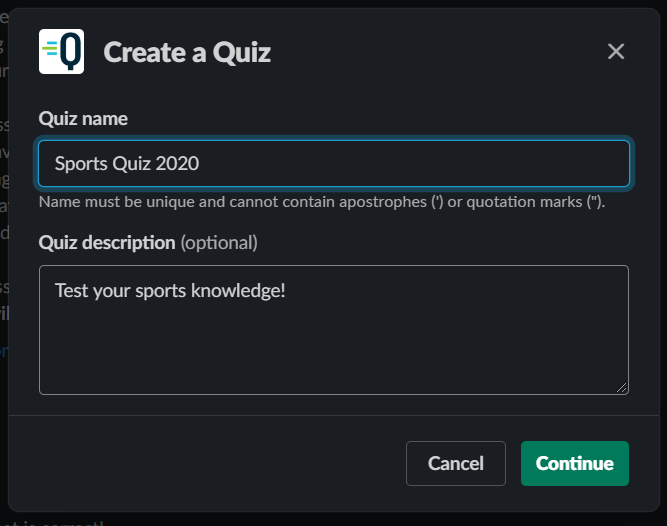
Enter an appropriate, short name for your new quiz. This quiz name must be unique to other quizzes in your workspace, and can’t contain quotation marks, special characters (@, &, $, % etc), or apostrophes. Optionally, you can also define a quiz description that precedes the quiz when a user takes it.
When everything looks good, click Continue. You can come back and edit this later, but only before you finish creating the quiz.
Quiz Question(s)
This window allows you to define a quiz question, its answer choices, and the correct answer.
In the first box, enter the question that you’d like to ask. This can contain emojis and links to images/videos.
In the following text boxes, enter the answer choices that the user will select from. Unlike previous versions of QuickQuiz, these answer choices do not have a character limit. Below each answer choice input is a button that determines whether the answer choice is correct or not - click the button to toggle it. Currently, you can only have one correct answer at a time, but in a future update, we plan to offer the ability to set multiple correct answer choices.
Each question must have a minimum of two answer choices, and you can add additional answer choices with the Add New Answer Choice button at the bottom of the window. Clicking on the […] button on the right side of an answer choice will allow you to delete it.
As with the previous step, you can go back and edit these details at any time until you complete the quiz creation process.
Click Save to continue.
Quiz Overview
Here, you can see all of the information that you’ve entered so far - the quiz title on top (which may be shortened to fit inside of the window), the quiz description, and quiz questions.
To add additional questions, click on the Add New Question button below the existing quiz questions - this will bring you back to the step described above. You can also delete questions by clicking on the [...] button to the left of the question and clicking Delete Question.
In this window, you can also use the [...] buttons to edit different parts of the quiz until you complete the quiz creation process.
Below the quiz questions, in the Additional Settings section, all users can toggle whether or not a notification is sent to them after a user completes this quiz and the passing percentage of the quiz. Teams on our Premium and Pro tiers are able to assign due dates to the quiz. These Additional Settings can be changed at any time (even after the quiz is created!) using the /quiz manage [quizname] command.
Quiz Assignment
In the final step of the quiz-building process, the quiz is assigned to individual users and / or channels within your workspace.
You can click inside one of the text boxes and start typing the user or channel you’re looking for and/or select it from the dropdown. You can click the Back button to return to the quiz overview, where you can edit quiz details before you finalize it.
You can access this window at any time with the /quiz assign [quizname] command.
Once you click Assign and Publish Quiz, you cannot go back and change your quiz title, description, or questions! Please make sure everything looks good before you click the green button.
Done!
Your quiz has been created and assigned - congrats! All assigned users should have received notifications that tell them how to start taking your quiz