![2617210b577d672136104a4f5660e04f07acf843-removebg-preview.png]](https://help.knowledgeanywhere.com/hs-fs/hubfs/2617210b577d672136104a4f5660e04f07acf843-removebg-preview.png?height=40&name=2617210b577d672136104a4f5660e04f07acf843-removebg-preview.png)
✨This feature utilizes the Knowledge Anywhere ✨Assistant AI for Studio to function
Before you begin: You'll need an ✨Assistant AI for Studio license assigned to your user account. If an AI option appears greyed out, contact your administrator or Customer Success. If you've just been granted a license, sign out and back in before the AI options will appear.
Choosing a Generation Method
There are three ways to generate an assessment with AI:
|
Method |
Best for |
Where it's available |
|
From Text |
Quickly building questions from copy you paste in |
Assessment courses and Studio assessment pages |
|
From Existing Document |
Building questions from a file in your Resources library |
Assessment courses and Studio assessment pages |
|
From Course Content |
Testing learners on the sections of a Studio course they've just completed |
Studio assessment pages only |
All three methods support Multiple Choice, Multi-Select, and True/False questions, and all three produce a standard assessment you can edit, configure, and activate like any other.
Generating an Assessment Course from Text or a Document
Step 1: Add a Resource (Document method only)
If you're generating from pasted text, skip to Step 2.
Go to Content > Manage Content > Resources and click Add A Document. Enter a Document Title and choose your file. Supported formats are .pdf, .gif, .jpg, .jpeg, .png, .tiff, .docx, .xls, .xlsx, .ppt, .pptx, .csv, and .txt, with a maximum file size of 20 MB. Click Save to create the document.
Step 2: Create the Assessment Course
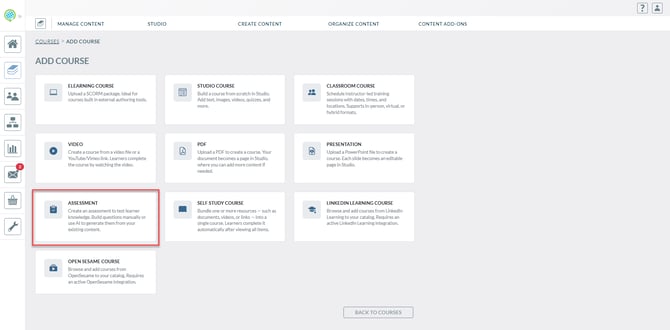
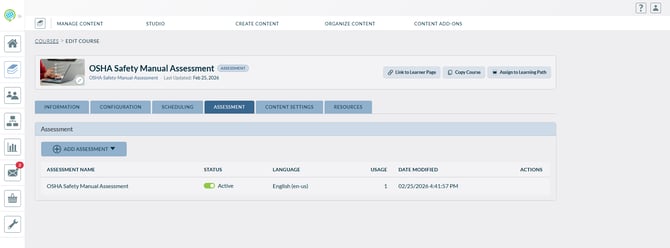
Go to Content > Add Course > Assessment. Fill out the course details and any optional metadata, then save. Once the course is created, open the Assessment tab and adjust the passing score if needed.
Step 3: Generate Your Questions
On the Assessment tab, select Add Assessment and choose your method.
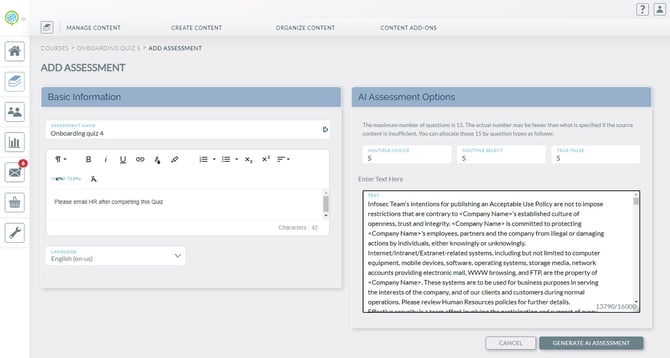
To generate from text: Select Add Assessment From Text. Enter the assessment title, description, and any metadata. Choose how many questions you want and which question types to include. Paste your source text into the box on the right; it supports up to 16,000 characters, including spaces. The number of questions available depends on how much text you provide. Click Generate AI Assessment.
To generate from a document: Select Assessment from Existing Document, which opens a side panel where you choose the document you uploaded in Step 1. Click Create Assessment From Document, fill out the details and question types, and click Generate AI Assessment. Generation from a document can take several minutes. You can keep working on other tasks in the meantime, and a green notification bar will appear when it's complete.
If you'd prefer a video walkthrough of the document method, you can watch it here.
Once your questions are generated, continue to Editing, Configuring, and Activating Your Assessment below.
Step 4: Review and Edit your Questions and Answers
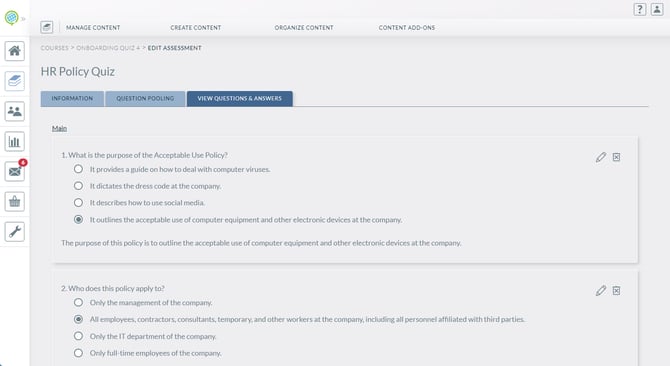
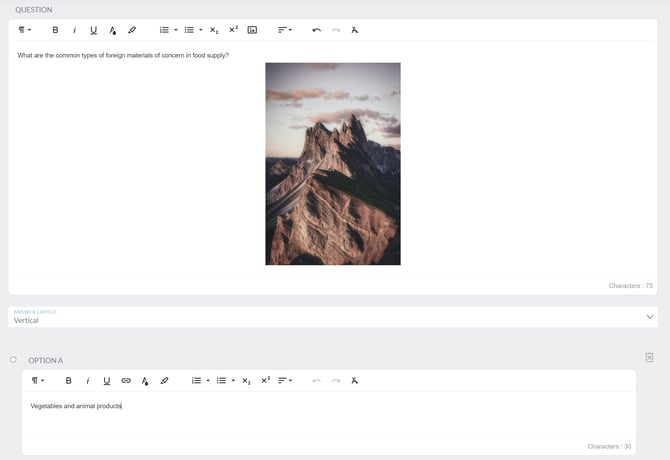
Once you are done creating questions, you can review them all via the third tab, View Questions and Answers, which shows you all your questions and answers. Feel free to edit further until you're ready to activate.
Step 5: Activate Your Assessment
Publishing your Assessment is the final step. Once the assessment is assigned to a learning path and group, activating
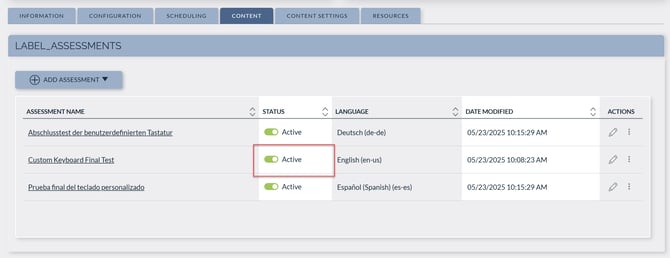
To publish your quiz, Go back to the Assessment tab, and flip the toggle so it's active.
This feature is integrated within Knowledge Anywhere's LMS. To discuss information about the Assistant AI, please reach out to your Account Manager or Customer Success at support@knowledgeanywhere.com.