Adding/viewing Custom Course Fields
- From the administrative portal, login as an administrator with Global role
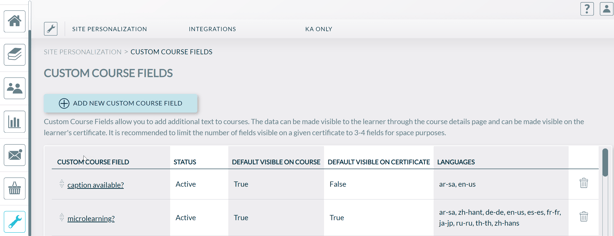
- Click on Settings > Site Personalization > Custom Course Fields
- A listing of existing custom course fields show in a grid
- To add, click ADD NEW CUSTOM COURSE FIELD
- To edit, click on the custom course field name
- To reorder them, drag on the up/down arrow icon next to the custom course field name
- To delete, click on trash can icon
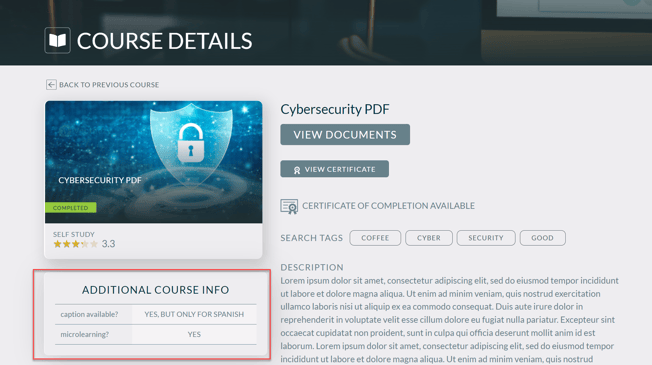
- The field labels and toggles set in the above page, when set as active, will bubble down as defaults when creating a new course or editing a course. Suppose the Cybersecurity Basics course shown below is newly-created. When viewing the Configuration tab, the default custom course field labels and their values are inherited from any active custom course fields defined above.

- You can specify the values for each field, as well as override the default toggle values for Visible on Course and Visible on Certificate
- When Visible on Course is turned on, the field shows on the Course Detail page:
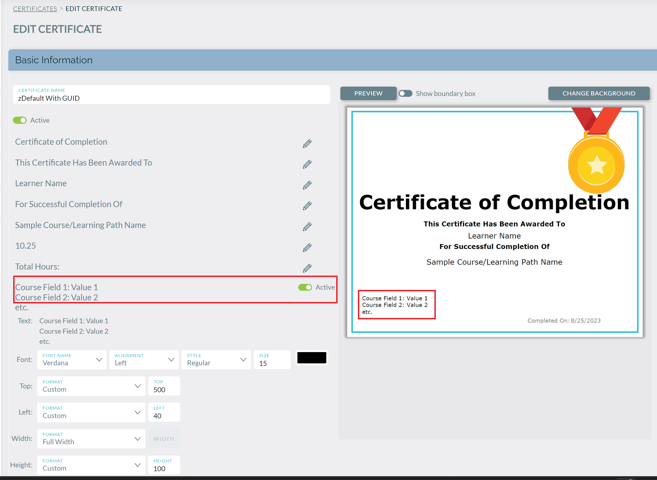
- When Visible on Certificate is turned on, the field is activated on the certificate that is associated with the course if the setting shown below on that certificate is also activated:
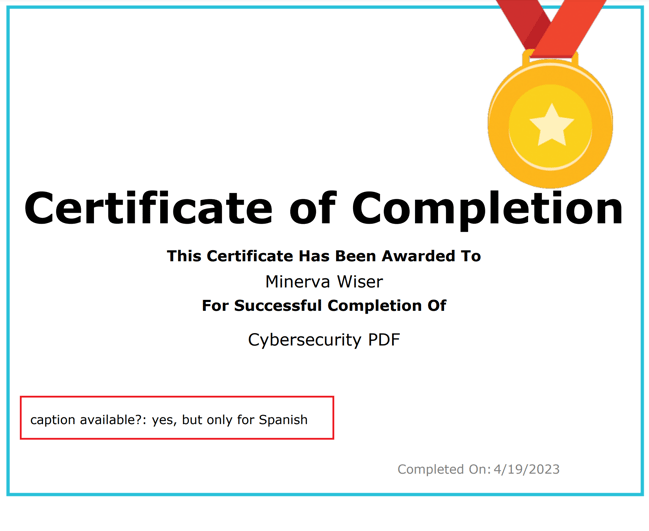
- The end result is that the downloaded certificate shows the custom course field:
- In the administrative portal, to there are 3 reports (when run in advanced mode) that can be filtered by custom course fields, and/or display those values. These reports are:
- Learner Details Report
- Course Details Report
- Learning Path Details Report