When creating a classroom course, it’s a good idea to add classroom locations to the LMS in advance, so that the specific location you’re looking for can be easily selected from a list. Sometimes, however, classroom locations might not be known at the time you’re creating the course. But that’s OK. Administrators can simply add the location and specific offerings to an existing classroom course when the details are known.
To add a location to the LMS
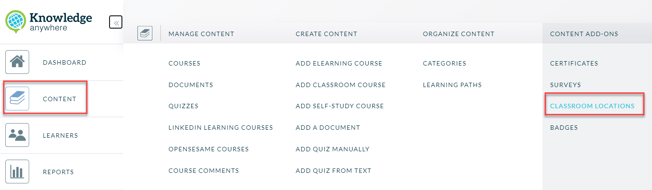
- Open the Administrative Dashboard
- From the Content tab, select Classroom Locations
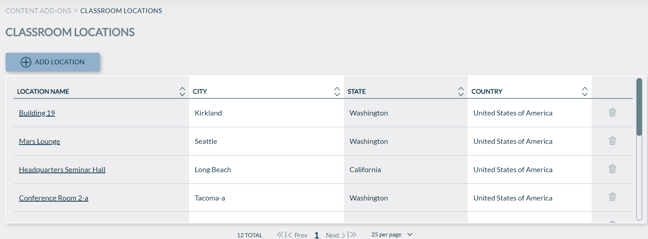
- From the Classroom Locations page, select Add Location
- Enter the desired information, then click Save
- The Classroom Locations page reappears and displays a list of classroom locations that have been added to the LMS, including the one you just added. Repeat this process for each classroom location that you want to add to the LMS.
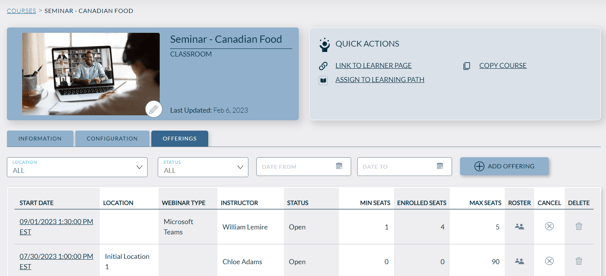
Sometimes when classroom courses are initially created, all classroom locations and available time slots might not yet be known. But once they are determined, the administrator can simply add the location and course offering details to an existing classroom course.
To add an offering (which is tied to a Location or Webinar Type) to an existing classroom course
- select Content on left menu, then Courses
- find the course to which you'd like to add an offering
- click on the course name
- click Offering tab
- Fill in all the desired fields.
- All the date and time fields are required
- Instructor is required
- You can associate a physical location in the Location field, and/or a Webinar Type. If a Webinar Type is specified, then the webinar link is required
- Click SAVE
- Click Back to Offerings to see it